Maps for Sage CRM – Installation Guide
This guide explains how to install Maps for Sage CRM and prepare it for use.
Install the Maps for Sage CRM Application
Run the Maps for Sage CRM installer on the same Windows server as Sage CRM.
- Sign in to the server using an account with administrator access.
- Run the supplied installer as an administrator.
- Follow the installer instructions.
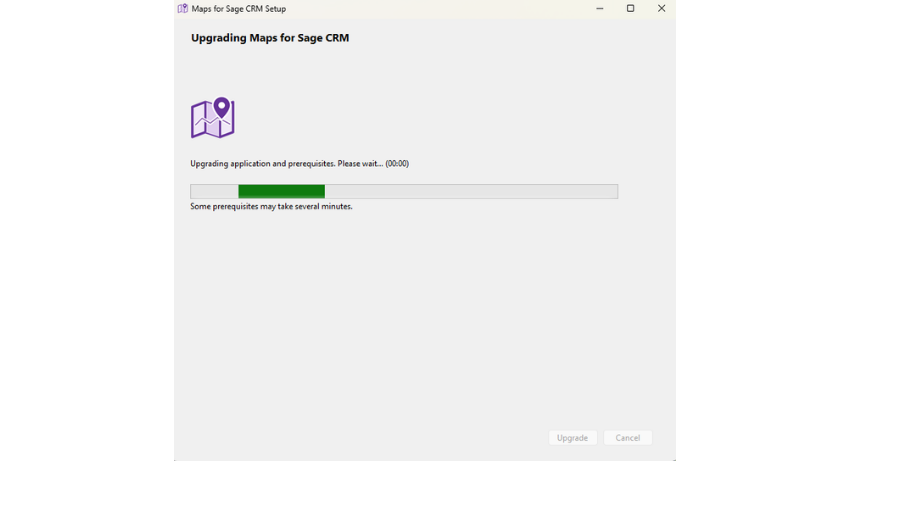
- Allow the installer to install any included hosting prerequisites.
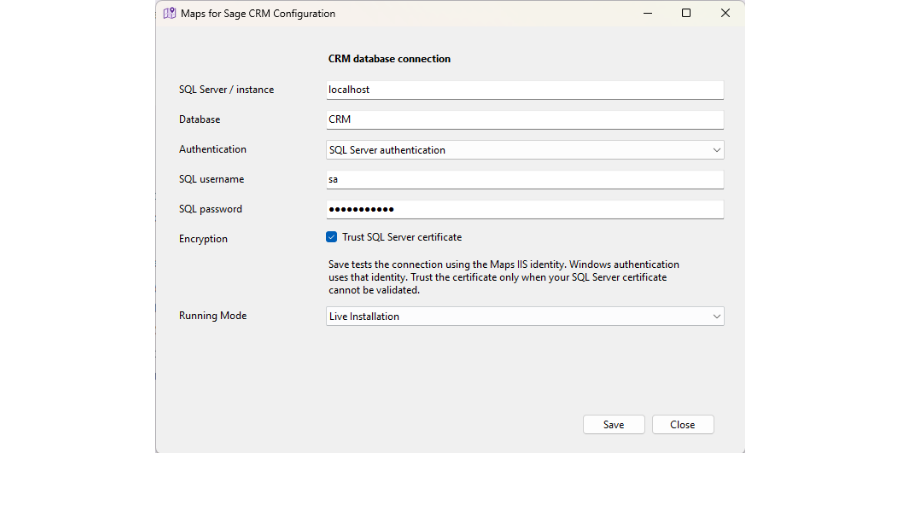
- Enter the connection details for the database used by your Sage CRM installation (see below for more details).
- Complete the installation and check that it finishes successfully
Maps for Sage CRM is installed as an IIS web application on the server alongside Sage CRM.
SQL Server Connection
The installer will prompt for SQL Server connection details, with options for SQL Server Authentication or Windows Authentication.
If you select Windows Authentication, Maps for Sage CRM will connect to the CRM database using the IIS Application Pool identity. By default, this is ApplicationPoolIdentity. Please ensure that the selected IIS application pool user has the relevant permissions to connect to the Sage CRM database with db_owner rights. Typically it is best to change the Application Pool identity to a local machine user account and grant that SQL permissions.
Changing SQL Connection Details
Use the supplied Maps for Sage CRM Configuration utility to change the server, database, authentication method or credentials after installation. This utility is installed with Maps for Sage CRM and can be found via the Start menu on the server where Maps for Sage CRM is installed.
Install the CRM component
Once the Maps application is installed, install the supplied CRM component into the intended Sage CRM installation.
- Sign in to Sage CRM as an administrator.
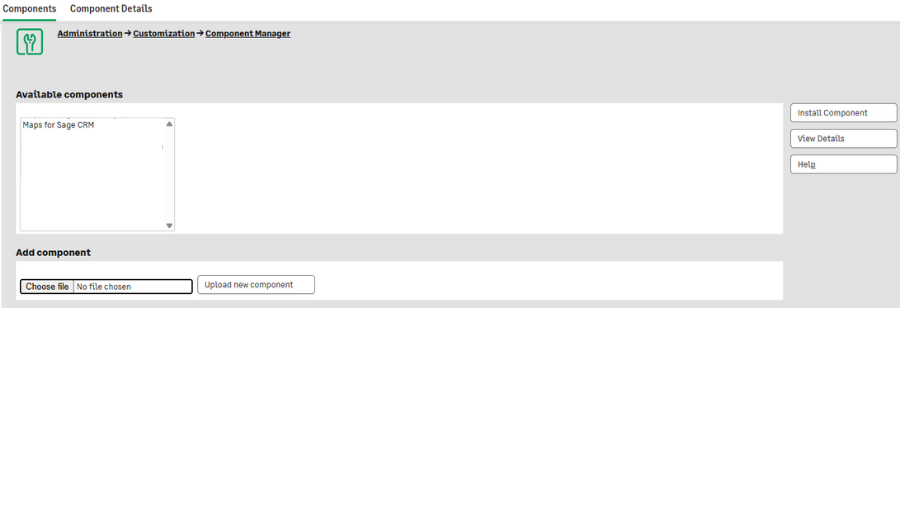
- Go to Administration > Customisation > Component Manager
- Under Add Component, click Choose File and select the Sage CRM component zip file included with Maps for Sage CRM
- Click Upload Component; Maps for Sage CRM will appear in the list of Available Components
- Select Maps for Sage CRM in the list of Available Components and click Install Component
The component adds the CRM customisations and administration pages required by Maps for Sage CRM.
Add your Licence
- Sign in to Sage CRM as an administrator
- Go to Administration > Maps for Sage CRM > Licence
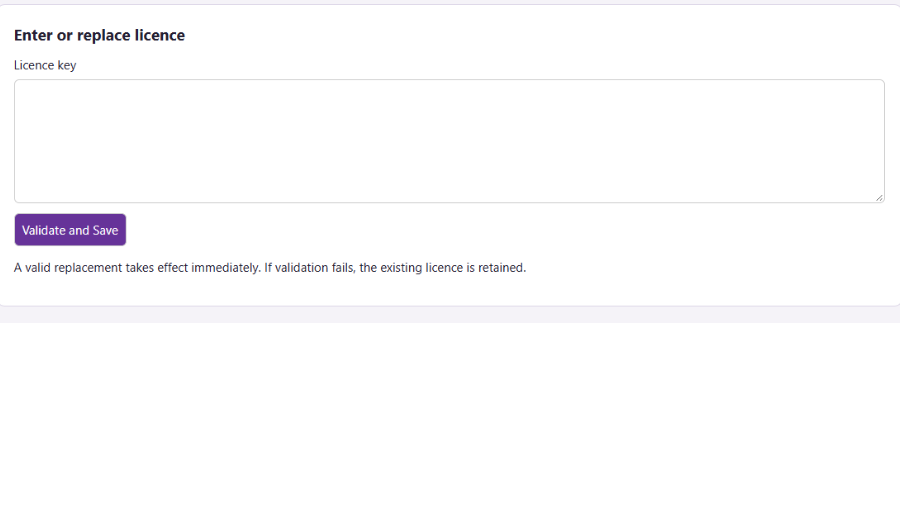
- Enter the provided licence key and click Validate and Save
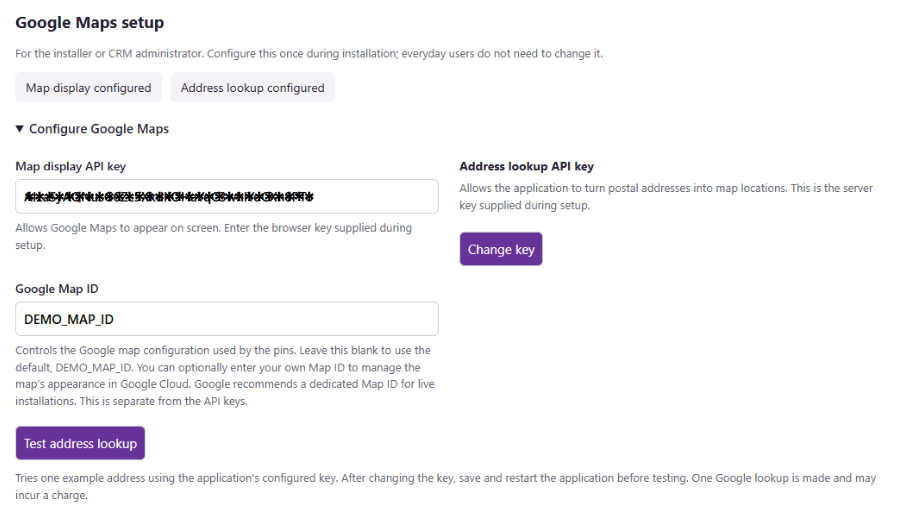
Configure Google Maps
Refer to our Google Maps Setup guide for information on setting up a Google Maps API account/project
- Sign in to Sage CRM as an administrator
- Go to Administration > Maps for Sage CRM > Settings
- Go to Google Maps Settings > Configure Google Maps
- Enter the Map Display API key and Address Lookup API key obtained from your Google Cloud project*
- If you are using an optional custom map layout, enter the ID into the Google Map ID field
Displaying a map and looking up an address use different parts of the Google Maps configuration. Check both before proceeding:
- Use the Test Address Lookup button to confirm that the Address Lookup API key is working
- View the Maps screen from the main CRM navigation bar or the Maps tab under any standard record to confirm that the Map Display API key is working
Google Maps usage is billed separately by Google. Review your billing and usage controls before processing a large number of addresses.